
A sterilization reel holder with manual cutter and sealer is one of the most fundamental and widely used packaging devices in central sterile supply departments (CSSD), operating rooms, dental clinics, and medical instrument reprocessing facilities. It enables precise cutting and secure heat-sealing of sterilization reels and pouches, ensuring reliable barrier protection for surgical instruments, endoscopes, and other medical devices before sterilization.
In this comprehensive guide, we'll cover what a sterilization reel holder with manual cutter and sealer is, how it works, the different types available, step-by-step instructions on how to use it properly, key safety considerations, common applications, and how to choose the right unit for your sterile processing workflow.
A sterilization reel holder with manual cutter and sealer — also known as a sterilization pouch dispenser, manual heat sealer station, or reel-to-pouch cutting/sealing unit — is a compact workstation designed to hold sterilization reels, cut them to the desired length, and create hermetic seals on both ends or sides of pouches using heat-sealing technology. The device combines a sturdy reel holder, an integrated manual cutter blade, and a thermal sealer bar in one ergonomic unit.
The sealing process uses controlled heat (typically 120–180 °C) and pressure to fuse the multi-layer sterilization paper/plastic laminate, forming a strong, bacteria-resistant barrier compliant with ISO 11607 and EN 868 standards. Modern units often feature adjustable temperature controls, seal width selectors (2 mm, 8 mm, 12 mm), and safety mechanisms to prevent burns and ensure consistent seal integrity.
The performance of the entire system heavily depends on the quality of the sealing element and cutter blade — purpose-built components maintain clean, straight cuts and reliable seals through thousands of cycles.
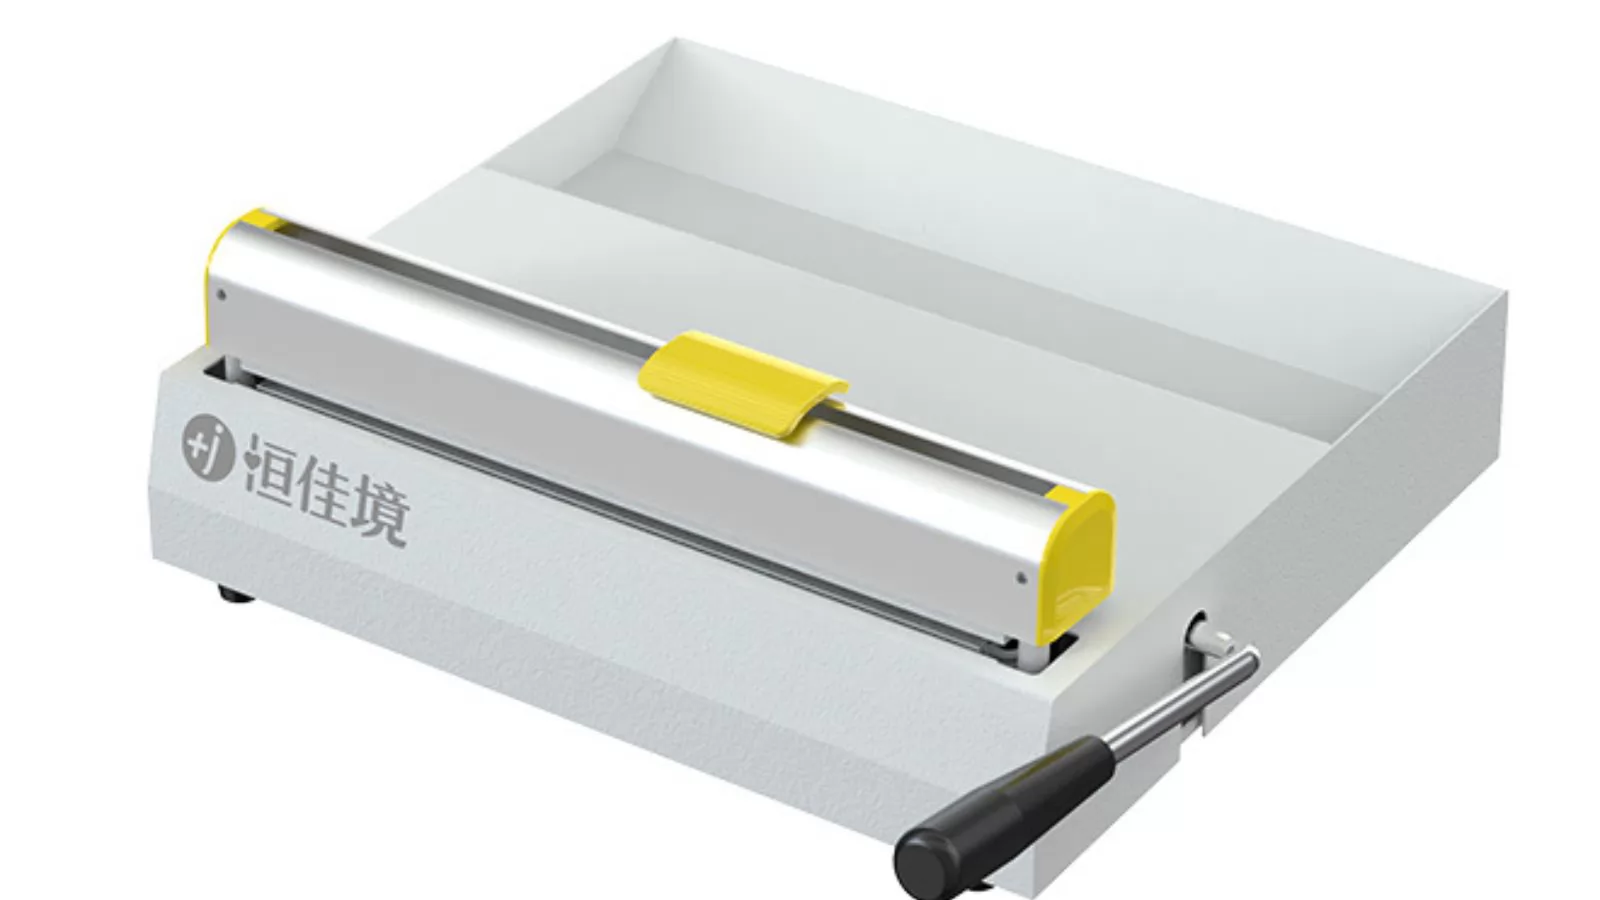
Understanding the device's anatomy helps operators use it correctly and maintain it properly:
1. Reel Holder / Spindle
The adjustable shaft that securely holds sterilization reels of various widths (50 mm to 300 mm or more). It prevents unraveling and allows smooth dispensing.
2. Manual Cutter Blade
A sharp, stainless-steel rotary or straight blade that slices the reel material cleanly and straight. The blade is usually replaceable and safety-guarded.
3. Heat Sealing Bar
The heated sealing element (usually Teflon-coated) that fuses the pouch material. Seal width and temperature are adjustable for different pouch types.
4. Temperature Controller
Digital or analog control for precise sealing temperature setting. Many models include a ready indicator and over-temperature protection.
5. Sealing Timer / Pressure Mechanism
Manual lever or foot pedal that applies consistent pressure during the seal cycle (typically 2–6 seconds depending on material).
6. Work Surface and Guides
A flat stainless-steel or powder-coated table with alignment guides to ensure straight pouch formation and consistent seal margins.
7. Safety Features
Cool-touch housing, blade guard, thermal cut-off, and emergency stop to protect operators from burns and cuts.
There are several categories, each suited to different throughput and facility requirements:
1. Tabletop Manual Unit
Compact, bench-top design ideal for small clinics, dental offices, and low-volume CSSD areas.
2. Wall-Mounted Model
Saves counter space and positions the unit at ergonomic height for frequent use in busy reprocessing rooms.
3. Foot-Pedal Operated Sealer
Hands-free sealing via foot pedal, allowing operators to use both hands for pouch positioning — preferred in high-throughput settings.
4. Adjustable Temperature Digital Model
Features precise digital temperature control and LED indicators for consistent sealing across different reel materials.
5. Multi-Reel Holder Station
Supports multiple reels simultaneously for rapid switching between different pouch widths.
The process involves four main stages:
Stage 1 — Dispensing: Reel material is pulled smoothly from the holder to the desired length.
Stage 2 — Cutting: The manual cutter creates a clean, straight edge for pouch formation.
Stage 3 — Sealing One End: The first seal is created on one side to form an open pouch.
Stage 4 — Final Sealing: After inserting the instrument, the open end is sealed, completing the sterile barrier system.
Correct operation ensures seal integrity, sterility maintenance, and operator safety. Follow these steps:
Step 1 — Inspect the Unit Before Use
Check cutter blade sharpness, sealing bar cleanliness, temperature calibration, and ensure all safety guards are in place.
Step 2 — Load the Sterilization Reel
Place the reel on the spindle with correct orientation (print side facing up/out). Adjust tension if necessary.
Step 3 — Set the Temperature
Adjust sealing temperature according to reel manufacturer recommendations (usually 130–160 °C for most paper/plastic reels).
Step 4 — Pull and Cut the Material
Pull the required length and use the cutter to make a clean cut. Ensure the cut is perpendicular for uniform seals.
Step 5 — Form the Pouch and Seal One End
Fold or align the material and seal one end to create an open pouch.
Step 6 — Insert Instrument and Final Seal
Place the clean, dry instrument inside, leaving adequate seal margins (at least 10–15 mm). Seal the open end.
Step 7 — Inspect the Seal
Visually check for continuous, uniform seal width without channels, wrinkles, or burns. Perform peel test if required.
Step 8 — Label and Store
Apply sterilization indicator labels and transfer pouches to the sterilizer cart or storage area.
Adhere to OSHA standards and facility protocols:
1. Never Bypass Safety Guards
Keep hands clear of the hot sealing bar and cutter blade during operation.
2. Wear Appropriate PPE
Use heat-resistant gloves when handling recently sealed pouches.
3. Allow Cooling Time
Do not touch the sealing bar immediately after use — allow it to cool or use the cool-touch zone.
4. Regular Cleaning
Clean sealing bar and cutter area daily with approved disinfectants to prevent residue buildup.
1. Central Sterile Supply Departments (CSSD)
High-volume pouch preparation for surgical trays and instruments.
2. Dental and Oral Surgery Clinics
Packaging small instruments and handpieces.
3. Endoscopy Units
Preparing flexible endoscopes and accessories for sterilization.
4. Outpatient Surgery Centers
Cost-effective packaging for day-case procedures.
Daily: Clean sealing bar and cutter. Check temperature accuracy.
Weekly: Inspect blade sharpness and replace if dull. Verify seal integrity with test pouches.
Annually: Professional calibration and sealing element inspection.
Consider reel width range, daily volume, sealing width needs, and whether foot-pedal operation is required for ergonomics.
The sterilization reel holder with manual cutter and sealer is a cornerstone of safe sterile packaging — delivering fast, reliable, and compliant seals for medical devices. Understanding proper setup, operation, and maintenance is essential for infection prevention staff, sterile processing technicians, and CSSD managers.
By following the guidelines in this guide, facilities can achieve consistent seal quality, reduce rework, and maintain the highest standards of patient safety. Contact Jiajing Medical for expert advice or product specifications tailored to your sterile processing needs.


Your Name*
Your Email*
*We respect your confidentiality and all information are protected.

A sterilization reel holder with manual cutter and sealer is one of the most fundamental and widely used packaging devices in central sterile supply departments (CSSD), operating rooms, dental clinics, and medical instrument reprocessing facilities.

This guide covers all essential equipment and a standardized step-by-step process for healthcare facilities. For more details, see What is Endoscope Reprocessing.


